
How to make a mold in a brushing way?
Making a part mold is a little bit complicated than that in a pouring way.
2-part brush-on molds are ideal for replicating complex shapes that would otherwise be impossible with a pour (block) mold or glove mold. Using a brush-on technique gives the silicone more flex when demolding and require less silicone than pour molds. Splitting the mold into two parts can allow you to work around undercuts in a mold.
Note that you can add more than one mold part line, however this will increase the complexity of your mold.
With a good knowledge of silicones in advance, now we can just get down to the point.
1. Get a perfect original model ready.
Find a perfect original model. If the model is smooth and flawless enough, then we can definitely make a perfect mold with it.
Examine your model and determine the best position for the part line. Remember to keep an eye out for undercuts and other awkward geometry.
Make registration keys. You may use a few nuts and filled the centers with clay. Build the part line out of clay and embed the registration keys.
Spray the model with mold release. This will aid in releasing the model after it has been molded.
2. Molding Side I
Once the mold release has had a few minutes to set, begin mixing the first batch of silicone.
Measure out an equal volume of part A and B. The first coat will be very thin so mix just enough to cover the entire model lightly.
In a new container combine parts A and B. Mix completely and begin applying to the model with a brush.
This layer will determine how accurately the mold captures the model, so be very precise and try to get every detail.
Be sure to brush gently, as the clay is soft and easily damaged by the brush.
The silicone will want to run off your model, you'll have to catch the bits that run off and reapply them to the model.
As the silicone begins to cure, the drips will become less frequent. GTSIL- P 20 has a 25 minute pot life so be patient, you may have to stand there for quite a while until it stops.
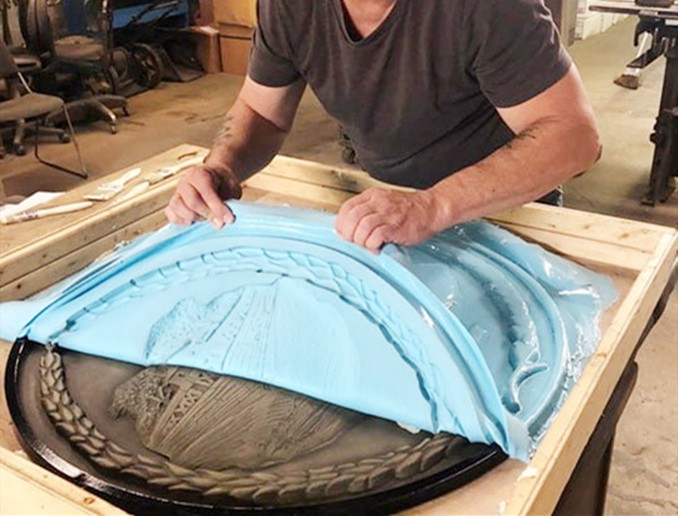
Once the first coat has partially cured (no longer tacky, dry to the touch), The second layer will be thicker than the first. I find it easier to apply the next few layers with a spatula like device than a brush.
On the final layers a thickening agent can be added to the silicone to keep it from dripping off the model and allow you to build up certain areas, like the part line. You only need a few drops of thickening agent to make it stiff enough. Keep applying layers until you have a consistent .25"-.5" wall thickness on the model. Try to make the outer layer as smooth as possible. This will aid in releasing the mother mold from the silicone mold later.
3. Molding Side II
Once the first half of your mold has cured completely, remove the clay part line barrier.
Be sure to remove all registration keys that may be embedded in the silicone.
Clean up the silicone part line as best as possible and spray the second half of the mold with release agent. Because silicone will be applied directly to more silicone on the part line, it is a good idea to make sure there is a lot of release agent in that area. Apply several coats of release agent, wait a few minutes between each coat. If the part line fuses it'll be difficult or even impossible to separate the two halves and your model will be trapped inside.
After the mold release has set, apply silicone to the second half of the mold as you did for the first half. Remember to build some thickness along the part line.